This is a re-write of a procedure I covered indirectly in the valve clearance inspection procedure but thought I'd write it up on its own for ease of searching.
Gasket List
- Gasket, cylinder: 11173-06B03
- Signal generator cover gasket: 11491-27A30
- 4 x oil journal bolt washer (Gasket): 09168-08029
- 8 x valve cover bolt gasket (Washer): 09161-11008
- 2 x oil hose o-ring (O ring): 09280-14011
- 2 x spark plug gasket type 1 (Gasket, head cover): 11178-27A02
- 2 x spark plug gasket type 2 (Gasket, head cover): 11179-27A03
 |
| Valve cover gaskets |
Note, photo also includes APE cam chain tensioner and gasket which are not required for this service. The crankcase breather gasket is not replaced unless it's leaking.
Seat and Tank Removal
First remove the seat, then the gas tank. Tank removal procedure is here.
 |
| Tank removed |
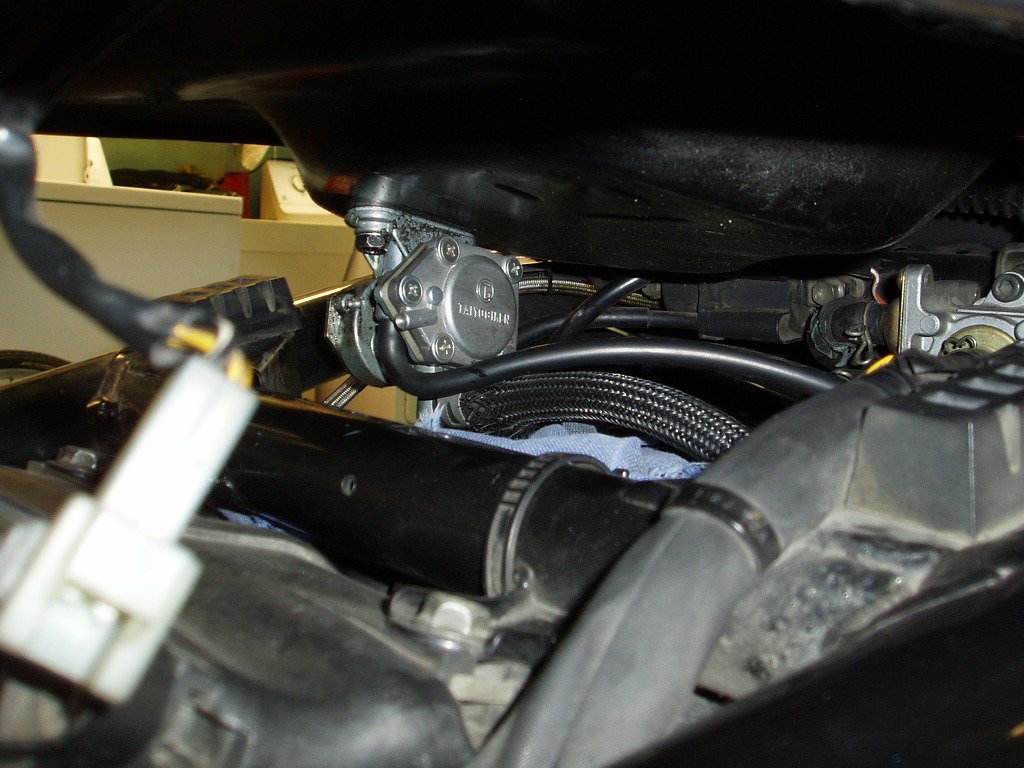
Valve Cover Removal
- remove the 4 hoses from the PAIR valve on the right-hand side of the frame, then remove PAIR valve from its frame mount with the single hex bolt.
- Unplug spark plug wires and move them out of the way
- Remove the breather hose from the breather on top center of the valve cover, then unbolt the breather and remove it and its gasket.
- Unbolt the two oil hoses from the back of the valve cover and throw away the o-rings. These need to be replaced.
- Unbolt and remove front and rear "shoulder bolts" from the valve cover (hex bolts with no gaskets underneath).
- In a criss-cross pattern, in several steps, unbolt the black hex bolts that hold down the valve cover, and the 4 silver-colored oil journal bolts that run down the center of the valve cover. Start with the silver oil journal bolts.
 |
| Plug wires removed |
Gently pry up the disc-shaped gaskets from the valve cover and throw them away. They will need to be replaced. Also throw away the metal washers underneath the silver oil journal bolts, those need to be replaced as well.
 |
| Pry up disc-shaped gaskets |
Finally remove the valve cover by lifting it straight off, and gently working it out on the left side. Most likely the valve cover will be stuck hard and can be very difficult to remove. Whatever you do, resist the temptation to wedge a screwdriver in there and pry. That is a sure way to damage the surface of the valve cover and/or cylinder head, and possibly even put a chip or hole in the valve cover. I used to take my bike to a reputable shop in SF to have valve clearance inspection done, and as a result have a crescent-shaped hole in my valve cover, presumably from where a mechanic jammed a screwdriver in there to pry it loose. You can hit it with a rubber mallet, which sometimes works, or tie some twine around two hex bolts protruding from either side of the valve cover and lift up.
With the valve cover off you can see the valves, cams, and cam chain.


Next remove signal generator cover by removing all hex bolts. Note the bolt at the top has a washer. If needed whack the cover with a rubber mallet to get it loose.
Reassembly
To be continued...